Tuesday, June 17, 2014

Review: My Cherry Culture Haul

I promised guys! Here I am. My last exam was this morning so I'm keen as to get right into my blogging again, in addition to my random posts on my instagram @jemsbeautyau. So, I promised you a little review of everything I got in my recent Cherry Culture, and here I am to deliver!

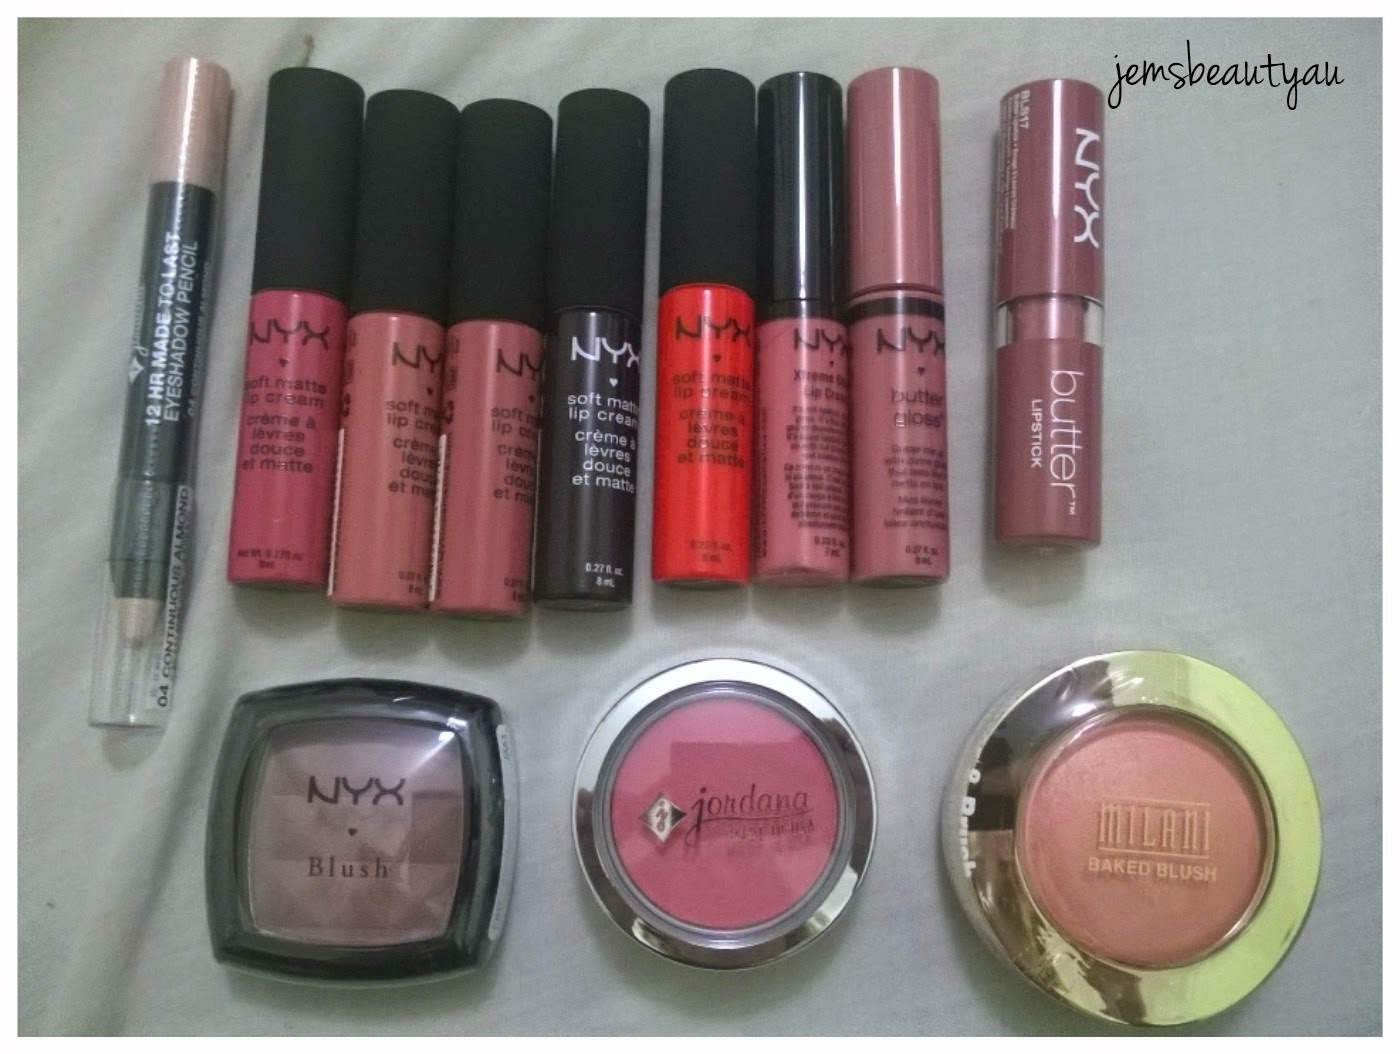
Just a little reminder of what I got:
So hard to work out what kind of lip colours I like...

  • Jordana 12 Hr Made to Last Eyeshadow Pencil in "Continuous Almond"
  • NYX Matte Lip Creams in San Paulo, Cannes, Zurich, Transylvania, Morocco
  • NYX Xtreme Lip Cream in Nude Peach Fuzz
  • NYX Butter Gloss in Tiramisu
  • NYX Butter Lipstick in Pops
  • NYX Blush in Taupe
  • Jordana Blush in Rich Sorbet
  • Milani Baked Blush in Luminoso
Let's take a closer look at these:
No Flash.

Flash.
This goes:
  • Taupe
  • Luminoso
  • Rich Sorbet
  • San Paulo
  • Zurich
  • Cannes
  • Transylvania
  • Morocco
  • Tiramisu
  • Pops
  • Nude Peach Fuzz
  • Continuous Almond
All bundled up. The actual products were maybe a 1/10th of this size.

On the whole I am super impressed with everything I got, and all of it will get put to use. And, as I said in my last post, I was also very happy with Cherry Culture's shipping - everything got to me in less than a week, packaged very tightly and everything was in perfect condition. Highly recommend them!


THE BLUSHES

L to R: NYX Taupe, Milani Luminoso, Jordana Rich Sorbet

My pretties.

NYX Blush in Taupe
Oh man. When I got this I was a little intimidated as it looks really purple. Like how Tough as Taupe Colour Tattoo just looks straight up purple. It's scary okay. But, as I'm sure you guys have heard countless times in reviews before, this really is a perfect colour for contouring on pale skin. I even tried nose contouring with it and it worked well! Very happy with it and it'll be getting some good use. The only thing is I didn't realise how small it would be, but that's definitely not an issue - especially considering the $5 USD price tag.

Milani Baked Blush in Luminoso
This blush is gorgeous. I love coral/orange blushes because they look so natural on the face. This blush is so soft (look at the swatch!) and easy to blend. Definitely going to be needing some more of these. For $8 USD (the most expensive item in my order), I am very pleased.

Jordana Blush in Rich Sorbet
I'd never even heard of these blushes until I was scrolling through the Jordana page and saw that they were only $2.50 USD. "Two fifty?! I can't afford NOT to buy one!!!" I say as I mindlessly add it to my cart. I looked up a bunch of swatches and finally decided on Rich Sorbet because a) I don't have a colour like it, and b) I wanted something matte. When I got it, I kind of regretting it because it looks so pink. I tend to avoid pink on my face due to the natural redness of my cheeks. But, as you can see in the swatch, it's actually quite lovely and not too pigmented (a good thing in a bright pink blush), and my regret has disappeared. Yay!


NYX SOFT MATTE LIP CREAMS

San Paulo, Cannes, Zurich, Transylvania, Morocco


NYX Soft Matte Lip Creams in San Paulo, Cannes, Zurich, Transylvania, Morocco
I'm going to do a general review on the formula of these, then talk a little bit about each individual colour. In general, I love these matte lip creams. They glide on so nicely, and smell heavenly (sweet desserty sort of smell). My dry lips can't handle it for more than two or so hours though - at that point, I have to give up on the transfer-proof finish and apply a balm, or remove and reapply. But I don't even care, because the colours are unlike anything I've ever seen in a drugstore lip product. They are freakin gorgeous. The 2014 colours especially (which we don't have yet in Australia cos like, Australia). San Paulo is the only 2013 and the only one available in Australia. Although, it is crazy worth buying them online, because they're only $6 USD each. I really wanted Copenhagen and Prague but they weren't available. Sad times.
San Paulo is a really gorgeous dark mauvey bright pink. I got heaps of compliments when I wore this at my mum's party the other week, it is just so flattering. Zurich is a peachy nude, which is my favourite type of nude. Whenever I looked up swatches/compared tubes, Zurich and Cannes looked exactly the same, but are actually very different in terms of actual product. Cannes is a deeper, nudey mauvey brown, which is a great MLBB colour. Transylvania is a pain to work with, patchy as but with a gorgeous payoff when you get it ever (blotting helps). It's a dark, plummy purple-brown. Morocco is a super bright, red-orange (cos I needed another one) that is stunning.


THE OTHER LIP CREAMS/GLOSSES/STICKS
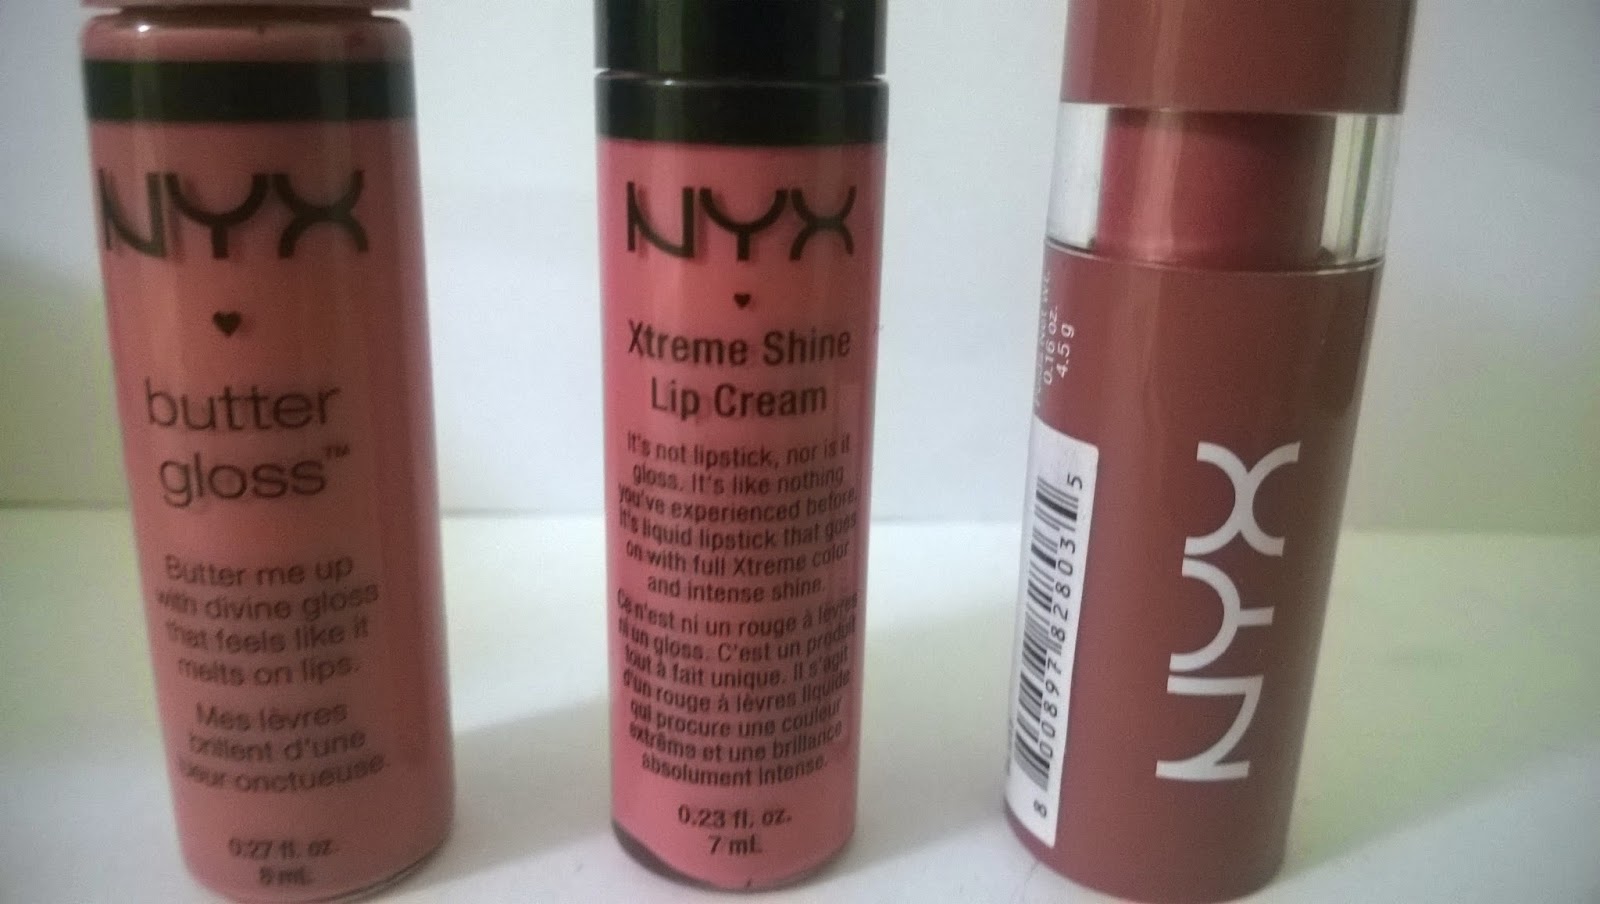
Butter Gloss in Tiramisu, Xtreme Lip Cream in Nude Peach Fuzz, Butter Lipstick in Pops


Couldn't get it to stay still.

NYX Butter Gloss in Tiramisu
I am not a gloss person. I tried to love this. I love the colour, a creamy light mauve. But I just don't wear gloss that much. That being said, I'll definitely try to wear this when I have a matte eye or base, and want a simple colour on my lips. Gloss girls, you'll love these. Great colour payoff and not THAT sticky (all glosses are sticky and anyone who tells me otherwise is a liar).

NYX Xtreme Lip Cream in Nude Peach Fuzz
You actually can't buy these in Australia either, except in the $30 5 lip packs you can buy at some Targets. So I wanted to grab one to try out the formula. The formula is kind of weird. It's a bit like a thicker, more pigmented version of the gloss. I thought it'd be more matte - not sure why, the word matte isn't anywhere on the packaging. But it's a great little product, just not very me. The doe foot applicator is sick though, I've never seen something like it - it's better than the ones on the Matte Lip Creams for sure.

NYX Butter Lipstick in Pops
MLBB!!! This is a perfect My Lips But Better Colour. Creamy, moisturising, glides on like a charm and has surprising staying power. Also doesn't sink into the lines of my lips! I was so stunned when I wore this for the first time. A definite winner, and I wish I heard more about it!


THE EYESHADOW PENCIL


Yeah. Follow the instructions. The lid is a bit of a pain in the ass.

Jordana Eyeshadow Pencil in Continuous Almond
I love this. I think it was $4 USD, and is just an all-round achiever. Eyeshadow base, inner corner highlighter, waterliner, even as a concealer around my eyes (just so happens to be the perfect colour). Only issue with it is that the colour kind of disappears as you blend it in. So it works best when you don't have to blend it all that much.


And another post is done! Hope you enjoyed reading guys, have I convinced you into doing a US product haul? I hope so. The price can't be beat. It just seems unfair when you go back to Priceline and a Maybelline lipstick is $18.

Practising on cutting down my blog post sizes (ok who am I kidding, no I'm not.)

Thanks for reading! And don't forget to follow me on Insty if you can't get enough of me - @jemsbeautyau <3

Friday, June 13, 2014

Quick Look at My Cherry Culture Haul - In-Depth Review to Come!

Hey guys! I'm in the middle of uni exams now (literally have one tomorrow), so I can't do a big long blog post as much as I'd like to, but I didn't want to leave you with nothing to read so I thought I'd quickly do a little post whilst on my study break.

If you follow me on Instagram (which you should - @jemsbeautyau), you'd know I just got my haul from Cherry Culture. It only took six days to get here! (Including a public holiday!) Super impressed.

Here's what I got:


A bunch of NYX lip products at obscenely cheap US prices, a NYX blush, a couple of Jordana pieces and an amazing Milani Baked Blush.

Here's everything laid out:
- Jordana 12 Hour Made to Last Eyeshadow Stick in Almond
- NYX Soft Matte Lip Creams in San Paulo, Cannes, Zurich, Transylvania, Morocco (I REALLY wanted Prague and Copenhagen but they didn't have them)
- NYX Xtreme Lip Cream in Nude Peach Fuzz
- NYX Butter Gloss in Tiramisu
- NYX Butter Lipstick in Pops
- NYX Blush in Taupe
- Jordana Blush in Rich Sorbet
- Milani Baked Blush in Luminoso


I'm so excited! Heaps of these (especially the Matte Lip Creams) have been on my wishlist for about six months now, and I finally had enough things I wanted to justify the shipping cost.

I'm really glad I finally got to try some things not available in Australia, since most of my beauty research takes place on /r/MakeupAddiction where many of the posters are American. So I've been reading about these products and brands for months and finally they are in my possession! Feels quite surreal to tell you the truth. I can't imagine the day where these American brands (I know NYX is available in Australia but the selection is SO limited and we are about 6 months behind on releases) are readily available in Target or Priceline or Myer. Seems unlikely but we'll see! Especially with the opening of Sephora (hopefully) this year in Sydney, maybe this is a huge turning point for the Australian cosmetic industry.

I digress. (I can't help but typing away and going off on a random tangent). It's not often I can do a big haul like this since its such a large chunk of money at once, even though per unit its way cheaper, so I was super super excited!

Again, I'll do a big review once my exams are over. Here are some swatches of all the lip products though!
From top left: San Paulo, Cannes, Zurich, Transylvania (one layer), Transylvania (two layers), Morocco, Nude Peach Fuzz, Tiramisu, Pops.
Hope this piques your interest for a further blog post, it'll be up within the next week I promise! Sorry for being so MIA, again once I get a decent camera and maybe a bigger income (once I'm on holidays and can earn some money), I'll be posting more frequently.

Until then, I'm always posting random things on Instagram and babbling away even more, so if you are interested in seeing more of my go follow me there!

Thanks for reading!

Monday, June 9, 2014

Review: Chi Chi Glamorous Eyeshadow Palette in "Dramatic"


Hi guys! Today I'll be doing a quick little review on one of the three Chi Chi palettes I have, "Dramatic". I chose this one over the other two I own ("Nudes" and "Bases") because there's barely anything about it online! In fact, I couldn't find it instore at Myer or Target, so maybe it's not for sale anymore. I'm not sure.

Regardless, it's a lovely little palette that retails for $22.95, but is frequently on sale or in gift sets - I got mine with the Bases palette, a blush and a bronzer for $15 from Myer earlier this year. It has a range of blacks, greys, purples, and oranges.


I really like the packaging. It doesn't feel like anything too expensive, but the plastic is nice and sturdy, the lid clicks closed and the range all match nicely. It's also easy to have a clear lid so you can peek inside to remind yourself of the colours. I like it much more than the packaging of other palettes, such as those in cardboard packaging, because fallout gets everywhere. Not pretty.


The palette has 12 decently sized colours, arranged in a nice sort of spectrum. Most are shimmery, with a few mattes thrown in for good measure.
They don't have names, so, numbering them from left to right:
No flash.
Flash.
1. A matte black. Slightly blue-based, if I had to pick a side. Pretty dead-on black to me.
2. A shimmery black with silver glitter. Looks the glitteriest of the bunch, slightly more grey than 1.
3. A charcoal grey, with silver microglitter.
4. A light, blue-based grey, very icy-looking. If that's acceptable as a description.

No flash.

Flash.
5. A shimmery, slightly cream-leaning white. Very pearly looking, no obvious glitter.
6. A matte blue-toned lavender.
7. A true, matte purple.
8. A crazy bright, warm-toned purple with purple microglitter.
(The flash picture is much more true to life than the one with no flash.)

No flash.
Flash.
9. A coppery orange with a pearly finish.
10. A slightly mustardy (that sounds awful) yellow, with yellow microglitter.
11. A mauvey purple with slight blue tones. Shimmery. A really interesting colour, the picture doesn't do it justice.
12. A dark purple-grey. Purple and silver microglitter. Looks different swatched to in the palette (much darker swatched).

Here are all twelve colours swatched on my arm over NYX Milk:
No flash.
Flash.

 They look disappointingly sheer without Milk, but to be honest, if you want to get the full potential out of any shadow you should use some sort of primer (Milk or otherwise). Look at them pop with Milk underneath! Number 8 especially is super impressive and stands out from the bunch. The cream white looks great too.
A threw together a little look for you to show you the possibilities with this palette:

Not the greatest of blending, but it was late at night. Forgive me.

I used:
  • Chi Chi Glamorous Eyeshadow Palette in Dramatic - 5, 6, 7, 12
  • NYX Jumbo Eye Pencil in Milk (as a primer and on lower waterline)
  • Rimmel London Glam Eyes Liquid Liner
  • Rimmel London Scandaleyes Lycra Flex Mascara
  • NYX Eyebrow Cake Powder in Blonde
So there you go! It's a fun little palette with lots of bright but wearable colours. The purples in particular really work together, the blacks and greys are super versatile, and, really, where else are you going to get a crazy copper like that?!

Let me know what you think! Thanks for reading.

Friday, June 6, 2014

Recreating a Tutorial: Feat. Lorac Unzipped

I really wasn't sure what to title this post as!
Today I decided I wanted to do a look using my amazing Lorac Unzipped Palette, but realised I am really bad at coming up with eyeshadow looks. I also realised I practically never follow tutorials, and when I do, my finished look is never quite the same. And I figured a lot of you guys are in the same boat. So I decided to follow a tutorial by the lovely Hunter Gray, or /u/TheKittenButcher if you happened to be on Reddit. Do you guys use Reddit? You should. /r/MakeupAddiction is my life. And /r/AustralianMakeup. Go sign up now.

Anyway, so I decided to follow Hunter's tutorial but show you guys my results, step-by-step to see how looks end up different on different people. Does that make sense? So pretty much I'm just recreating her tutorial to see how things turn out.

Firstly, the link to her tutorial is here. Her photos are much nicer than mine, so if you're struggling to see some detail in my photos, head on over to her tutorial.

So this is the eyes shadow look I'm showing you guys today using the Lorac Unzipped Palette:
I wish the photos had shown the vibrancy of the eyeshadow a bit better, but I think the general look is still evident.

Here are the products I used in the completed look:
Eyes: Lorac Unzipped Palette, Australis Eyelid Primer, NYX Jumbo Eye Pencil in Milk, e.l.f. Waterproof Liquid in Coffee, Rimmel London Scandaleyes Lycra Flex Mascara, and a Mirinesse Lash and Brow Comb

Face: Revlon Colourstay Foundation for Dry Skin in Ivory, Rimmel London Stay Matte Foundation in True Ivory, Rimmel London Stay Matte Pressed Powder in Translucent, e.l.f. Contouring Blush and Bronzer in St Lucia

Brows and Lips: Makeup Forever Aqua Brow in 10 Light Blonde, NYX Soft Matte Lip Cream in Stockholm, Essence Clera Lash and Brow Gel

So let's get this thing started!

Start with your naked eye:
Here's mine. I've already done my eyebrows since they are 100% non-existent if I don't.

You can have the rest of your makeup already done. I've done everything but lips here.

Grab your primer:
I'm using the Australis one with the crazy shiny packaging that makes it difficult to photograph. I nearly always forget primer (bad Jemma!) but this stuff really helps your eyeshadow stay in place. Use whichever you want though, I ain't tellin you how to live your life.

Dab it on your eyelids until it's all dry. Fingers work.

Smile stupidly as you grab your Milk pencil:
I love my milk pencil. It can do pretty much anything. Prime your lids, highlight, brighten your waterline, even a base under lipstick... It is wonderful. Dab it on lightly, and blend it in with your finger, you don't need a lot.


Grab your eyeshadows and your tools:
Here is my wonderful Lorac Unzipped. I got it off /r/MakeupExchange from an American seller who was willing to ship to Australia (yay!). I don't use eyeshadow all that much but these colours are wonderful. If you don't have Unzipped, that's totally fine, just use whatever colours you have closest.

For this look, I primarily used the Real Techniques Base Shadow Brush, but use any you feel comfortable with - a flat brush for placing down colour and a fluffy round brush for blending should be enough.


Pat Undiscovered (or any gold shimmery shadow you have), onto the inner half of your eyelid, going up towards your crease, but not past it.


Then using Unattainable (or a similar shimmery bronzey-brown), place your shadow on the outer half of your eyelid up to where Undiscovered ends. Again, don't go past the crease.


Next, use a matte brown (Unspoken from Unzipped) and work it into your crease with a light hand. You can always add more. Grab your blending brush and use windshield wiper motions back and forth to blend the matte brown into the other two colours. You're trying to focus on getting rid of the harsh lines where the eyeshadow ends. Holding the brush by the very end of the handle can help if you have a habit of over-blending. I also added some of the matte brown on my lower lash line.


We're getting somewhere!
Next, I took Undercover (the matte cream/white) and patted some under my brow bone and into the inner corner of my eye. I forgot to take a picture, sorry!

Wing time!:
Yay! My favourite part. Using any liquid eyeliner (or a soft pencil, or gel liner if you want), add in a wing. Any colour, any size. I used a brown liquid liner and did a teeny little wing, but anything goes.

Mascara:
Use your favourite mascara and give your lashes a coat! 

I also lined my lower waterline with Milk to brighten my eye up a bit.

And ta dah! That's how I recreated Hunter's look. Here it is, all finished up:

Smiling because I never smile in my makeup photos. I finished it off with NYX Soft Matte Lip Cream in Stockholm. Have I professed my love for this colour yet? It's perfect.

And that's it guys! Hope you've enjoyed something a bit different today. I wanted to do this because I am, by no means, an expert, I just love makeup, and I like seeing tutorials translated onto different people to make it seem a bit more achieveable! I think the thing with getting a really good eyeshadow look is taking your time, and practising your blending! I'm still not very good at blending. And invest in some nice brushes if you're thinking of wearing eyeshadow a lot.

Once again, full credit goes to Hunter Gray for this look, go look at her Reddit posts, they are all so inspiring.

Let me know if you decide to try this look out and thanks for reading! 


Wednesday, June 4, 2014

Quick Review: Ulta3 Lipsticks

I promise I will review things other than lipstick guys! It just so happens I have way too many in comparison to other products, therefore there are a lot more for me to choose from to review. Today I've decided to take a look at Ulta3 lipsticks, in specific the three I have - three of the regular line, and one of the matte line.


These are $2.95 from selected pharmacies (you can find stockists on their Facebook page here) or $3.95 for the matte lipsticks. And, I've got to say first off, that is an absolute steal for the sheerest, poorest-lasting lipsticks, and these are far from!

But before I go too far, let's take a look at what we've got:
Ulta3 Lipsticks, from top to bottom: Brown Sugar (matte), Firecracker, Coral Reef, Lilac Glow

Oooh pretty! Firstly, I love their packaging - sleek, matching, with a clear section at the bottom so you can see what colour your choosing, as well as a sticker that has the name printed on! For some reason I hate it when there isn't a sticker with its name or you can't see what colour it is (like Mac lipsticks) because there's no clear bit or coloured sticker or packaging. Grrrr. Anyway! So these tick the first box.


This photo kind of explains what I'm on about. When they're all packed into my lipstick container (which is really just like a mini open box sort of thing) I can see what colour I'm grabbing! Genius!

Ok onto some swatches. I am SO pleased with these swatches, my phone was cooperating for once and they are nearly completely true to life!


From left to right:

Brown Sugar (matte): THIS IS MY ABSOLUTE FAVOURITE LIPSTICK. Like I think we're talking Holy Grail territory here (I know, a $4 lipstick. I am so happy). I've nearly finished it (I've never finished a lipstick in my life) and I'm really worried that I'll go back and buy a new one and it won't be the same colour (I've noticed recently that a few of the testers at my local don't match the corresponding sealed lipsticks which scares me, I didn't check this one though). But it's such a gorgeous colour. I would describe it as a dark dusty rose colour with brown tones, a bit mauve-y? I'm really bad with colour descriptions. It does look a bit scarily brown in the tube, and in the swatch, but the rose colour really comes through when on the lips. When applied, it is super opaque, creamy and stays for as long as any comparable lipstick (I don't have huge success with lipstick lasting on me). I just wear it with everything. It is my perfect dark My Lips But Better, so those girls out there with light, cool-toned skin should check this out. Well, actually, everyone should for that matter. The only downside is it's not actually fully matte. Don't go expecting Velourlips or NYX Soft Matte Lip Cream finish, I would call it a semi-matte finish. Saying that, I am a massive matte lip fan and it's matte enough for me, so I really have no complaints. This will definitely be the first lipstick I actually repurchase!

Firecracker: This was the first Ulta3 lipstick I ever got. It actually featured in my battle of the oranges from my last post. It's such a great red-orange! When I bought it, I was looking for a true orange so I was a bit disappointed, but to be honest it's a bit more wearable than if it had been plain orange. As much as you might not believe me when I say this, but it actually isn't too bright. It's super wearable for daytime. It applies opaque, feels soft on the lips and doesn't slip around on my lips. Also a big hit with me - but check the above link for a bit more information.

Coral Reef: This colour is so pretty, it's a red-pink coral (no orange) that is bright and summery. It applies nicely, is opaque in one swipe, and smells divine (I think only this one and the Lilac one smell good, no idea why). However, it is a tad bit more slippy on my lips (one day I'll figure out how to describe that properly). It's fairly bright on the lips, leaning towards neon but not quite. Definitely a bold colour, but bold lips are my favourite!

Lilac Glow: A medium pink-purple. Also smells amazing - these are the two I've bought most recently so maybe that has something to do with it. As much as I like this colour, this is my least favourite of the four - it's not quite as opaque as the others, a bit slippy and doesn't seem to last quite as long. However, it doesn't apply patchily, feels great on the lips and may be better for those looking for a less bold purple lip.

My little lipstick photo shoot. I think I got over-excited.

All of these lipsticks are super moisturising and not drying - something I have a huge issue with (my lips are a desert). I think they're a great little choice if you have a little spare change to spend, or are looking for a particular colour for dressing up. There is a huge range, with something for everyone. I would recommend swatching each one individually, as there can be small differences in the formula (as you've seen above). But the greatest thing is, even if you've made a wrong choice, you're only the price of a coffee out!

Hope this has helped you guys, sorry that I babble on so much. Let me know if I really need to cut my words down.

Thanks for reading!

P.S. sorry I use brackets so often! It's honestly a weird writing habit of mine, because I write my exact thought processes, which apparently have a lot of tangents.