Friday, July 11, 2014

Review: eBay "Jessup" Brushes

Hi guys! If you read many beauty blogs or follow beauty Instagrams, you might have come across a brand of brushes known as "Jessup" that have been touted as Sigma dupes. Unfortunately I don't own any Sigma brushes so I can't do a comparison but mine came in the mail while I was in New Zealand so I'll be doing a review for you.

These come in eight or ten piece sets, with the choice to buy just the eye or just the face brushes. There are also other sets of eye brushes, but I only have the ones that came in the set.


Prices vary slightly - I got my ten piece set for about $18AUD with postage, which I think is slightly more than average because I specifically wanted the silver and black set (they also come in silver and white, gold and black, gold and white, and some coloured ones, depending on seller). But, in comparison to Real Techniques or Ecotools at Australian prices, you can't really go past it - one Real Techniques brush retails for about $15 at Priceline. So I decided to give them a go.


And I'm so glad I did.

In general, this set of brushes is amazingly soft, sleek and professional looking, with NO hairs falling out (so far at least, I haven't washed them yet). The one big setback I saw many bloggers talk about was their 'chemical' smell. I did purposely smell them as I opened them, and did notice this smell, however I really don't think I would have if I hadn't specifically been looking out for it. If that makes sense. Also, once you use them for any sort of product or even leave them out in the open for a bit, the smell completely disappears. Now they just smell like makeup.

These can be easily found by googling "Jessup Brushes" on eBay and scrolling through the options until you find the set and colour you want. Be warned, the shipping will likely take forever, but, again, a small price to pay for what you are receiving. I bought mine here but there are plenty of sellers to choose from.

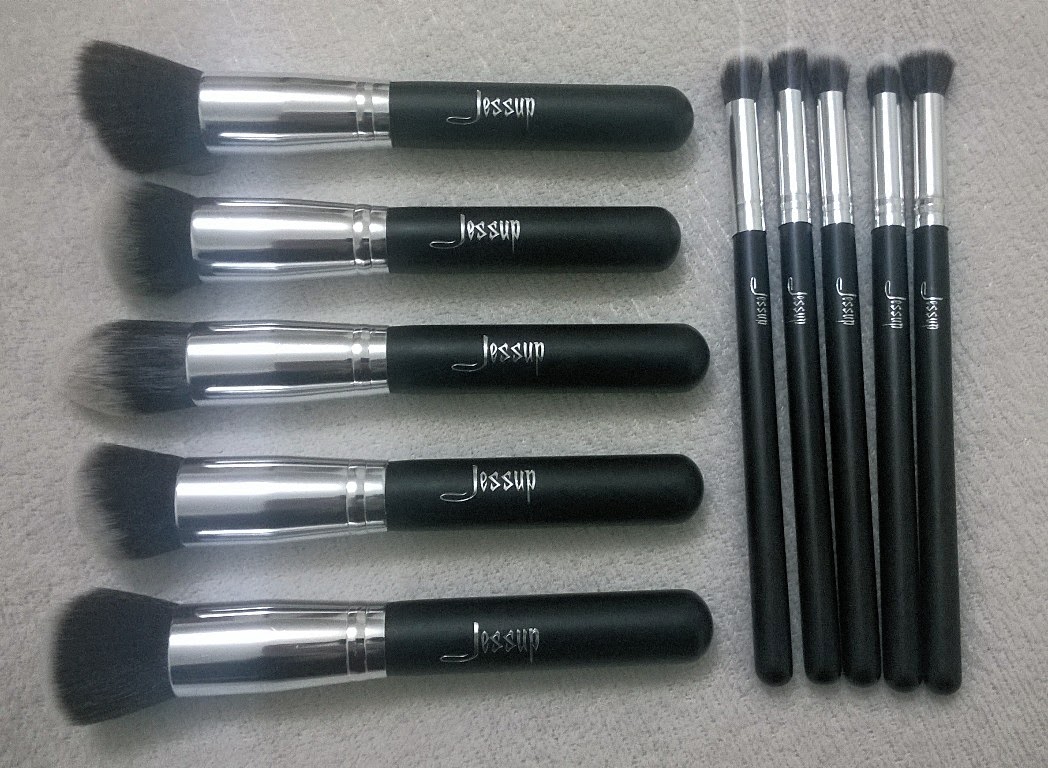
The ten brushes you get in the set are:

  • Flat Kabuki
  • Angled Kabuki
  • Tapered Kabuki
  • Round Kabuki
  • Flat Angled Kabuki
  • Precision Angled
  • Precision Flat Angled
  • Precision Round
  • Precision Tapered
  • Precision Flat

Face Brushes
Flat Kabuki, Angled Kabuki, Tapered Kabuki, Round Kabuki, Flat Angled Kabuki

This is a great little five piece set. They have made welcome additions to my admittedly small collection of face brushes (two stippling brushes and a powder brush... shame), and I've found that, although they have some similarities, each has its own purpose.

The Flat Kabuki is a wide, fluffy and soft brush, much less dense than the others (except the flat angled). I use it interchangeably with the flat angled brush, mostly for my setting powder, as I feel it places the powder much more precisely over my massive powder brush. It is good for swirling the powder onto parts of the face you might want more coverage. 

The Angled Kabuki is super soft (as they all are, but I feel the need to repeat myself for emphasis), with short bristles. It is fairly dense and works well for applying blush or a powder highlight, depending on how precise you want the application.

The Tapered Kabuki is the brush I thought I'd like least, but is actually the opposite. I always thought Tapered was close to a flat foundation brush and never really saw the appeal, however having one has made me realise how useful it is. I use it to apply my contour in the hollows of my cheeks, then use the Flat Angled Kabuki to blend upwards. It also works well for my powder highlight (specifically, the highlight shade from the Face of Australia Leopardess Palette, even though it's still a bit dark to truly 'highlight' my face, it kind of doubles as a blush or bronzer). It is great because it's not too pointed, and instead is a good dome shape which seems a perfect size for the face.

I use the Round Kabuki for application of my liquid foundation (normally Revlon Colourstay). It has short bristles and is even more dense than the Angled Kabuki. It is really good for buffing foundation right into the skin, however lacks an ability to blend well. However, it is my most used brush and feels like heaven on my face (my old foundation brush was a scratchy stippling brush). Definitely a good addition to a collection and reminds me a lot of the Real Techniques Expert Face Brush.

The Flat Angled Kabuki is probably the least dense out of the five, and I found it a bit useless when I first got the set. However, I've found its best use to be either patting on my setting powder or blending out my contour, as you can use the flat side for a more natural blend, or turn it and use it on its edge for precise blending.


Eye Brushes
Precision Angled, Precision Flat Angled, Precision Round, Precision Tapered, Precision Flat
I found these brushes not as individually important as the face brushes. I use nearly all of them interchangeably (except the Precision Tapered) as blending brushes. However, if you were going to have doubles of a brush, a blending brush is probably the best choice as blending eyeshadow always turns out the best with a clean fluffy blending brush - meaning less cleaning for all of us! Yay! So, I don't regret getting all five of these brushes, I just think they aren't as unique as the face brushes are.

The Precision Angled is the biggest brush out of all of them (even though it doesn't seem so in the picture). It is super fluffy and its bristles are quite long. (Is bristles the right word to be using? I'm not even sure). I mostly use it as a blending brush for the crease and up to the brow bone.

The Precision Flat Angled is the least 'perfect' looking brush, as my one has uneven bristle length and its shape seems a bit off - but maybe that's just my individual one. I mostly use it to blend out under eye concealer.

The Precision Round is the perfect fluffy blending brush that reminds me of a MAC 217, but with slightly shorter brushes and a less domed appearance. I use it the same as my Precision Angled brush and for when my Real Techniques Deluxe Crease Brush is just way too big for blending (which, to be honest, is most of the time).

The Precision Tapered, as with the face brushes, turned out to be my favourite. I realised I have no brush like this, except maybe my Ecotools pencil brush, which is actually way too pointed and not bendy and just a pain to work with. It applies eyeshadow easily into the crease or even into the corner of the eye or on the lower lashline. A great multitasker.

The Precision Flat Brush is like my Flat Angled Brush in that some of its bristles are a bit long and its shape is a bit out of whack, but is still a good brush to have. It can be used as a blending brush, but I think I'll be getting the most use out of it as a nose contouring brush, or even as a contour placement brush for when I want a really subtle contour.


There you go! I think they are a great brush set to add to your collection, and with the insanely cheap price you absolutely can't go wrong. They feel sturdy and long-lasting, not cheap at all. The only downside is, as I said, the time it takes for postage (I think mine was about a month), but, to be fair, they do point out the estimated delivery time on the page, so you can't really complain about that.

For less than a night out, this brush set is a definite must in my opinion.

Let me know if you've tried them and what you think.

Thanks for reading!

Wednesday, July 9, 2014

Travelling with Makeup: New Zealand Edition

Hey guys! Sorry I've been so MIA, I promise I have a good reason, and that is that I've just spent the past week in the gorgeous town of Queenstown, New Zealand! If you've ever been there, you'll know what I mean when I say you NEVER get sick of the view. If you haven't, ill attach a few happy snaps at the end to show you what I mean.

So, considering this, I thought I'd do a little blog post on what I brought with me, and pretty much my day to day face. I had to consider the coldness, and of course the fact I'd be spending three days skiing. My routine, to be honest, was not THAT much different to normal, more just pared down to the basics with products I knew would last and were easy to apply quickly leaning over the bathroom counter!I thought this would be easiest if I laid it out by purpose - everything from base to eyes.


Base


- Rimmel London Stay Matte Powder in Transparent
- Face of Australia Leopardess Palette
- Daiso Floral Black Powder Foundation Compact
- Revlon Colourstay Foundation in Ivory
- Rimmel London Wake Me Up Concealer in Ivory
- Maybelline Fit Me Stick in 110
- Rimmel London Stay Matte Liquid Mousse Foundation in True Ivory (mouthful)

I probably packed the most practically for my base, with basically just the essentials. Every day I put on makeup I used the Wake Me Up Concealer, which has a doe foot applicator and is easy to use in a rush, my Colourstay foundation, Stay Matte Powder and the Face of Australia Contour Palette. Speaking of, the mirror on that palette was an absolute godsend. I've never cared about mirrors on palettes until I had to travel with makeup!

I didn't really need to use my Fit Me stick or the Stay Matte Mousse, simply because the Colourstay was easy to apply and lasted ages, and was easy to apply with just my fingers.

I also only brought the Daiso compact because I went shopping there before my plane, so I didn't have much of a choice! The compact is super cute, the powder is a bit sparkly but for $2.80 you can't really complain!

Best for travel: the Rimmel Concealer for its simplicity and ease of use
Worst for travel: as much as I love it, the Colourstay foundation lid doesn't stay on, and the glass jar makes it fairly heavy and also more dangerous for travelling, especially overseas.


Eyes

Sounds like a lot more than it actually is.

- Essence Clear Lash and Brow Gel
- Daiso Eyeliner Coat
- Pur Minerals Shadow Stick in Iced Bronze
- Nyx Jumbo Eye Pencil in Milk
- Savvy by DB Eyebrow Pencil in Blonde
- Essence Long Lasting Eye Liner in Cest La Vie
- Simple Kind to Eyes Eye Makeup Corrector Pen
- Daiso Ellefar Felt Eyeliner

- Maybelline Master Precise Liquid Liner
- Rimmel London Glameyes Liquid Liner
- Rimmel London Exaggerate Liquid Liner
- Rimmel London Scandaleyes Lycra Flex Mascara
- Daiso Cream Eyeshadow in (I think?) Rose
- Nyx Eyebrow Cake Powder in Blonde

Yeah, I brought four liquid liners... I swear there's a reason for that. Anyway. The Nyx Eyebrow Cake Powder was a great choice for travelling, since it comes with a small angled brush and a spoolie (even though I've lost the angled brush and use my Ecotools one anyway), and the Essence Lash and Brow Gel was quick and easy to set them in place.
I didn't end up using the Savvy Eyebrow Pencil (didn't need it), the Simple Makeup Corrector Pen (forgot I brought it... silly me), the Glameyes or Exaggerate Liquid Liner (I fell in love with the Daiso liner, but that's another blog post for another day!) or C'est La Vie. My daily face was pretty much eyebrows, liquid liner wings, Iced Bronze on my lower lash line, mascara, and Nyx Milk in the lower waterline. On our nights out I used the Daiso Cream Eyeshadow all over and it stayed forever. Legitimately, had to soak my eyelids the next morning to get rid of it - but, again, my Daiso haul will come soon.

Best for travel: Nyx Eyebrow Cake Powder because it's an all in one palette!
Worst for travel: Probably the Pur Minerals Eyeshadow Stick and Nyx Milk because of their pain in the ass lids that crack and come off easily.


Lips


- Australis Mineral Inject Lipstick in Salsa
- Australis Mineral Inject Lipstick in Electro
- Nyx Butter Lipstick in Pops (forgot to put it in the picture)
- Ulta3 Matte Lipstick in Brown Sugar
- Elf Matte Lip Colour in Tea Rose

And I actually wore... none of these. Except Pops, which is the one I didn't photograph! Oops. The reason for this is mostly because I was in Queenstown where it is freezing and you are constantly reapplying lip balm. You don't really have smooth, prepped lips for lipstick. The one night when I wore Pops I didn't bother reapplying and instead just went over it with lip balm because, y'know, lip balm. It's a necessity. I brought over my Lucas' Paw Paw Ointment and a Burts Bees Pomegranate Oil Lip Balm, and bought some Lanolin and Kiwifruit Lip Balm while I was over there. Good stuff.

Best for travel: The Ulta3 lipstick because it's so cheap and the lid stays on well.
Worst for travel: The Elf Matte Lip Colour - pen form makes it hard to stick in a purse or pocket.


Tools

- Ecotools Angled Eyeliner Brush
- Pur Minerals Small Stippling Brush
- Mirinesse Powder Brush

Only three! I was even impressed with myself. I applied concealer and foundation with my fingers, then used the Powder Brush for my Stay Matte Powder. I used the Pur Minerals brush for contour and highlight, then the eyeliner brush for my brows. Easy as!

Since I don't have brush guards, I brought brushes I didn't care about too much (ie the Pur Minerals and Mirinesse ones), and one that I love so much I couldn't live without it for a week and would buy again in a heartbeat anyway (ie the Ecotools). They all got crammed in my tiny makeup bag, so I was reluctant to bring anything too expensive.

Best for travel: The Ecotools brush. This baby is seriously perfect.
Worst for travel: the Mirinesse powder brush, but only because a powder brush is just difficult to bring in general unless you have brush guards.


The Whole Makeup Mess


I swear, I performed some kind of magic getting that all into my teeny makeup bag.


That's all for now guys! Again, sorry for disappearing with no warning, but I have some great posts lined up, so watch out ;) xxx


Bonus NZ picture:
Queenstown was absolutely magnificent. You have to add it to your travel list, pronto!

Friday, June 27, 2014

Review: 5 of My Favourite Purple Lipsticks

Hi guys!

Today I'm doing a quick little review of 5 of my favourite purple lipsticks. Purple is one of my favourite colours of lipstick as it is surprisingly wearable whilst still being bold, and also because there are just so many shades out there to choose from.

My pretties.

The 5 I've chosen today are:
  • Rimmel London Moisture Renew lipstick in Sloane's Plum
  • Revlon Just Bitten Kissable Balm Stain in Cruch
  • Revlon Colourburst Matte Balm in Shameless
  • MAC Lustre Lipstick in Plumful
  • Face of Australia Glossy Lip Crayon in Berry Brulee

Swatches you say? But of course!


And my thoughts on each colour:


Rimmel London Moisture Renew Lipstick in Sloane's Plum
Sloane's Plum is a deep, pink-toned plum. The Moisture Renew formula is super moisturising and glides on, with absolutely no pull on your lips. It's a great colour, however one let down of the formula is that it doesn't 'stick' to your lips - it feels like it's just sitting on top of them and therefore is prone to going absolutely everywhere. I'm happy to wear this out if I'm going somewhere I won't be doing much talking, dancing or eating - such as a presentation or something of the sort - but definitely would not survive a night out unfortunately. Rimmel were so close with these ones!

Sloane's Plum goes for a cool $13.95 at Priceline and you can get it right here.


Revlon Colourburst Matte Balm in Shameless
Shameless is a slightly cool-toned purple. The formula, again I've spoken about before, but is very matte and this one especially can be patchy to apply (which doesn't seem to be an issue with some of the other colours in this range). Once you get it even however (usually through a series of blotting and reapplications), the colour is super unique and the balm dries down a bit, extending its wear time. Definitely an interesting colour that should be in any lover of purple lips' collection.

Priceline sells the Matte Balms for $17.95 here.


Revlon Just Bitten Kissable Balm Stain in Crush
This stain by Revlon is a deep wine colour that stains your lips a darkish pink underneath. I've raved about this formula before, but it's just absolutely creamy, feels great on the lips, has decent staying power (the longest out of all five), and fades evenly. The colour is dark but not too vampy, making it easily wearable for both day and night.

Pick up Crush for $17.95 from Priceline, available here.


MAC Lustre Lipstick in Plumful
This lipstick is a light, slightly sheer pinky plum, making it very wearable. It feels great on the lips, is super creamy and moisturising, and smells like the very familiar MAC scent of vanilla. Although it looks somewhat intimidating in the tube, it's a lovely day time colour and is a hugely popular MAC colour. Pick this one up for your day to day makeup when you need a little colour on the lips.

You can buy Plumful from any MAC counter or on their website for $36.


Face of Australia Glossy Lip Crayon in Berry Brulee
Noticed that I love lip crayons yet? This is a very pinky purple which is very moisturising and easy to apply. It is surprisingly opaque, making the colour appear almost as bright as in the tube. It has a glossy, but not high-shine finish. Its biggest letdown, however, is its complete lack of staying power, easily rubbing off before I've even left the house. I think a lip primer would make a massive difference to the staying power of this lip crayon, and would probably make me wear it a hell of a lot more.

Berry Brulee costs $7.95 from Priceline.


That's all for today! What do you think of these colours? What would your top 5 purple lipsticks be?

And, as always, thanks for reading!

Monday, June 23, 2014

6 Products I've Changed My Mind About

I am a fickle being. I can't have the same thing for breakfast for longer than a few weeks in a row before getting bored and searching for something else. My nails get painted over every other day. Most of all, I tend not to use the same makeup products every day, never searching for my "Holy Grail" products but instead mostly enjoy the constant search and acquisition of new, strange, interesting or colourful products to add to my collection. Of course there are many products that make constant appearances, but I've never bought backups for products and rarely ever repurchased! Maybe I just haven't found anything HG status worthy yet, but for now, this is what I love about makeup - playing with products, seeing what different things can do, as well as re-discovering old products and seeing if I feel the same way about them.

Here are 6 products that I've owned for a while, and my first impressions of them are substantially different to how I feel about them now (for better or worse!):


All opened up. So paranoid of getting makeup all over my white shag rug.


  • Revlon Just Bitten Kissable Balm Stain in Charm
  • Elf Matte Lip Colour in Tea Rose
  • Maybelline Colour Tattoo in Tough as Taupe
  • Australis Powder Cream Foundation in Nude Beige
  • Maybelline BB Cream in Light
  • Elf Cream Eyeliner in Black


Revlon Just Bitten Kissable Balm Stain in Charm (bloody mouthful)


I bought this without swatching because there was no tester at the Chemist's Warehouse I was at and I was in a bit of a rush and the swatches online were useless, and I just guessed it would be a good kind of nude colour to put on my lips when I didn't feel like bothering with bright lipstick (God knows why, it's literally like pastel orange which is definitely NOT nude, I don't know I go crazy around makeup and love the Revlon Balms). I got home and opened it and I was so disappointed. On my lips it just looked like bits of like, concealer or something - didn't help that my lips were chapped. But I kind of applied it once, realised it was nothing like I was imagining (totally my fault) and kind of cast it aside.

Then a couple of weeks ago I was going back through my Balm Stains and decided to try it out, and scrubbed the hell out of my lips and I realised it's such a great colour! I think it works well on my skin tone because I'm so pale, but it's a nice light peachy colour. I think I've realised the trick is to not apply to much, otherwise it's kind of uneven and the more layers you put on the more opaque it gets, which isn't a great thing because you don't want it to be too pastel on your lips.

Anyway this is one of the ones that ended up for the better and I'm so happy the money I spent didn't end up being wasted (even though I got it half off). Check out my blog post here for a swatch in comparison to the other orange lipsticks I own.


Elf Matte Lip Colour in Tea Rose

This is a funny little size. It's like in between pencil and crayon size. The bullet itself is actually quite good because it's small enough to get into the corners of your lips and line them easily, but then it's a bit more of an effort to actually fill them in.

I got this in an iHerb haul after extensive researching (as always) and decided to try it out (it was only like, three dollars I think). When I first tried it out, I liked the colour more or less (a light pinky mauve, slightly on the pastel side of things), and then I licked my lips accidentally and FREAKED OUT BECAUSE IT TASTES AMAZING. Like it honestly just tastes like sugar. It was wonderful, I was like 'hell yeah great tasting lipstick what a great idea'.

Have you noticed the flaw in that one yet? Before long, I realised it would disappear within about ten minutes because I would just lick it off my lips without even realising, negating the whole purpose of putting it on really. I've also come to realise that it actually pulls a bit on your lips because it's so matte, which isn't really a great feature either. But to be honest I was just so mad that no one in their reviews had mentioned that it tasted like sugar! So here it is for all you guys. Be warned.

This is one of the ones I loved initially, and then kind of lost interest in after I realised that it's not very wearable. And regardless of all of the above, it's weird size makes me kind of self conscious to re-apply in public as it just looks like a texta. Bit weird.


Maybelline Colour Tattoo in Tough as Taupe


I, of course, heard all of the hype for this product and its ability to be used for contour, cream eyeshadow, or even on your eyebrows. I bought it from /r/AussieMakeupExchange on Reddit and was so excited for it to come. When it arrived however, I took one look at it, swatched it on my finger, and just thought, "it's... purple?" It seriously looks like a veeeryyy cool-leaning grey (the above picture is pretty accurate) and I just couldn't believe that was meant to look good on my eyebrows. I gave it a go as contour a few times, and seriously struggled blending it in (I feel as though you'd need a wet sponge to do it well, since it is a quite dry formula), then eventually just let it get pushed to the back of my drawers to finally re-emerge at some later date.

And that it did! Right at the beginning of my beauty blogging, I was looking through my collection for inspiration to try some new things, spotted this little pot sitting up the back of my drawers and realised I'd never tried it in my eyebrows! I was very hesitant, but it actually pulls very neutral toned when you put it on, despite how it looks in the pot. It also is easily blendable with a spoolie and lasts for ages! It is, admittedly, a tad too dark to go with my light blonde hair, but I still use it when I'm aiming for an extra sharp brow.


Australis Powder Cream Foundation in Nude Beige

I am a huge fan of cream foundations simply because they are easy to use, have great coverage and aren't messy (unlike some powders and liquids). I was obsessed with this when I first got it for the above reasons. However, this was before I really knew much about foundation. And before I knew how to colour match. I still like the formula, however it comes in the smallest range of colours (I think four?) that are all kind of similar looking anyway. I've also realised, in comparison to many other foundations, it's pretty difficult to blend and get looking natural. It's just not something I reach for any more due to my love affair with Revlon Colourstay and Rimmel London's Stay Matte, amongst others. Also, look at that sponge. Gross.

If you happen to match one of their colours I would actually recommend this foundation if you're looking for something full coverage.


Maybelline BB Cream in Light

:

Sorry, but "Light" my ass, Maybelline. Look at that colour! You cannot possibly call that light. As you can probably imagine, when I got this product and saw the colour in it I was massively annoyed, because I'm pale and cool toned and there's just no way that colour was ever going to match. Moreover, it leaves your face a bit shiny-looking, like the look you get right after you apply sunscreen. Not a fan.

However, (I'm sure I've said that a million times so far), I've actually had a moderate amount of success by mixing this with my Revlon Colourstay (which is too light for parts of my face) and applying it all over, slightly darkening it and making it not so full coverage. Who would have thought! I originally started using it again in a sad attempt to try and finish at least one product in my collection, and it might actually happen now! Hint for all - play around with mixing your foundations (Revlon Colourstay and Maybelline Super Stay is another good mix).


Elf Cream Eyeliner in Black


I wanted this eyeliner so much I paid AUSTRALIAN price for it, choosing to go pick it up in person at Kmart rather than order online at iHerb and wait the week or so for it to come here. I know. Shocker. It was my first foray into the world of gel/cream liners, and, of course, because I had no comparison, I thought it was great. I could finally get a really super opaque black wing, which I was very impressed with. No complaints.

Then I got the Maybelline Gel Liner. And what a difference there is. The Elf liner is actually really difficult to get onto the brush because its so soft anf smushy, so I have to wipe off the excess on the side of the pot. The Maybelline one, however, is quite dry in texture and sticks well onto the brush and, therefore, your eyelid. The brush that comes with this liner is also crap (the Maybelline one is much better in my opinion). 

It still makes a small appearance here and there in my routine, but it's super creamy texture (to be fair, it is called cream liner), means that you often have to set it with powder to stop it from transferring, and the difficulty in getting on the goddamn brush just means that, well, it's not really worth the effort to me. And even though the Maybelline gel liner is a great little product, I find myself reaching for my liquid liner every. Single. Day. Ah well, the pot is cute and I'm sure once I use it up (if ever) it'll work well for some lip balm or something.


So there are my 6 products that I've changed my mind about! I'm sure others have similar products, those that they loved initially only to realise it didn't have a place in their routine, or conversely, those that seemed like a waste of money and gathered dust behind all your used items before its rediscovery and reincorporation into your routine.

Does anyone have any similar experiences? Let me know! As always, thanks for reading.


Thursday, June 19, 2014

Battle: My Collection of Eyeshadow Pencils/Crayons/Sticks

Hi guys!

Tonight's post is a little comparison (well, I like to call it a battle as you know) of my humble collection of jumbo eyeshadow pencils.

Here's tonight's line up:


From L to R: Jordana 12 Hr Made to Last Eyeshadow Pencil in Continuous Almond, Rimmel London Scandaleyes Eyeshadow Stick/Crayon in Guilty Grey and Gossip Green, Chi Chi Metallic Eyeshadow Stick in Solid Gold Dancer, NYX Jumbo Eye Pencil in Milk, Pur Minerals Shadow Stick in Iced Bronze

I love me some product photoshoots.

Here are my swatches, no flash and flash, as always (sorry they're in backwards order to above):
No flash.

Flash.

So how do they compare? EXCELLENT question, you've come to the right place.

Pur Minerals Shadow Stick in "Iced Bronze"
This is definitely my favourite formula in terms of texture and blendability. It doesn't have the sticky/creamy feeling that the NYX and Scandaleyes do (I'll expand on that after), and feels like eyeshadow, but without the powderiness. That's a really bad description. But it blends really well. The colour itself is fairly neutral, considering it's called bronze I was considering a more warm-toned colour. But I like it as a go-to brown. My only issue - and it's actually quite a major one - is that it's so goddamn SPARKLY. Like full on silver sparkles in there. Which, to be fair, is quite obvious since the pencil itself is sparkly, but is not really what I desire in a brown eyeshadow pencil. And, again, I feel as though a bronze labelled product would have gold sparkles, not silver. It's also a bit of a pain to sharpen, you can kind of see in my above pictures that the point is looking a little misshapen.

I received this as a present from a family member who buys makeup in bulk from those TVSN type things (which can be, admittedly, good value for money), so I didn't purchase it myself. I just went to look them up online and realised they're called "Liquid Metal Eye Pencils" which isn't what it says on the pencil itself (it just says Shadow Stick). Strange. Sorry if you wanted to buy one of these, you might have to go digging a bit.

NYX Jumbo Eye Pencil in "Milk"
Aaaah, the cult product. This was the very first thing I bought after being sucked into /r/MakeupAddiction on Reddit, and I'm glad I did. It's a great little multi-tasker. I use it as an eyeshadow primer to make bright colours pop, in my waterliner, as a face highlighter and inner corner highlight. It does have that slightly sticky, creamy consistency, which can be a bit strange to work with but setting it with a white or translucent powder tends to solve that issue. Overall, its a very diverse product that's super useful to have in your collection. Using it as an actual eyeshadow, however, is probably not the best use for it, as it can be better utilised in other ways.

Chi Chi Metallic Eyeshadow Stick in "Solid Gold Dancer"
I bought this for my year 12 formal, and one thing I can say for it is that is lasts, and lasts, and lasts. Seriously! Once set, it's staying power is great. It's formula is a bit like the Pur Minerals one, in that it isn't creamy per se, in fact this is more like a regular old pencil eyeliner - which isn't a negative at all. It has a great, bold gold colour, but unfortunately is a bit patchy when it comes to application. This is fairly evident in the no flash swatch above.

Rimmel London Scandaleyes Eyeshadow Stick/Crayon in "Guilty Grey" and "Gossip Green"
These Rimmel eyeshadow sticks are highly pigmented, creamy, and super easy to blend. They're a less sticky consistency than the Milk pencil, and the colours they come in are great. I got the green one first and had to go back and buy the grey. They are quite metallic looking, not shimmery or sparkly, but not matte either. You can see this especially in the flash picture of the grey above. The green is a pretty pure green, whereas the grey is very noticeably blue-toned. They glide on the eye easily and don't pull on the skin at all. If you're looking for an easy, affordable eyeshadow stick, these are probably your best best.

Jordana 12 Hr Made to Last Eyeshadow Pencil in "Continuous Almond"
I don't really want to talk too much about this, since it features heavily in my last blog post - the review of my Cherry Culture haul. It's a very light nude (well, nude for my skin tone) pencil with a creamy texture. I will say though, after I put these swatches on my arm, I had to go out somewhere so I quickly rubbed at them with a dry tissue and ran out of the house. Then my arms were covered all day and I forgot about them until the next morning. This swatch had not moved. Seriously, it was still in the exact shape, just a bit faded. The others were all faded and smeared, barely visible. So, A+ for that Jordana, you well and truly surpassed the 12 hour claim.


This is how I tend to wear them for a simple, no fuss look - just above my winged liner, from inner corner to outer corner. Gives a little pop of colour on my hooded lids when I'm too lazy for proper eyeshadow. This is my eye with Chi Chi's Solid Gold Dancer on:


So, is there a winner for this battle?

Not really. I feel as though they are all winners, just for completely different reasons. Pur Minerals, for it's texture and lack of creaminess when it's not wanted. NYX for being a complete all-rounder and highly, highly pigmented. Chi Chi is super metallic and lasts forever, giving a great twist to an otherwise basic eye look. The Scandaleyes do the best as a traditional 'eyeshadow pencil', and come in a range of great colours with a pigmented, metallic finish. And Jordana wins for sheer lasting power, and it's ability to magically match my skin tone perfectly.

Well, there we go. So much for a battle. Sigh
In all seriousness though, I hope this blog post has been helpful! And, as always, thanks for reading. Until next time!

Tuesday, June 17, 2014

Review: My Cherry Culture Haul

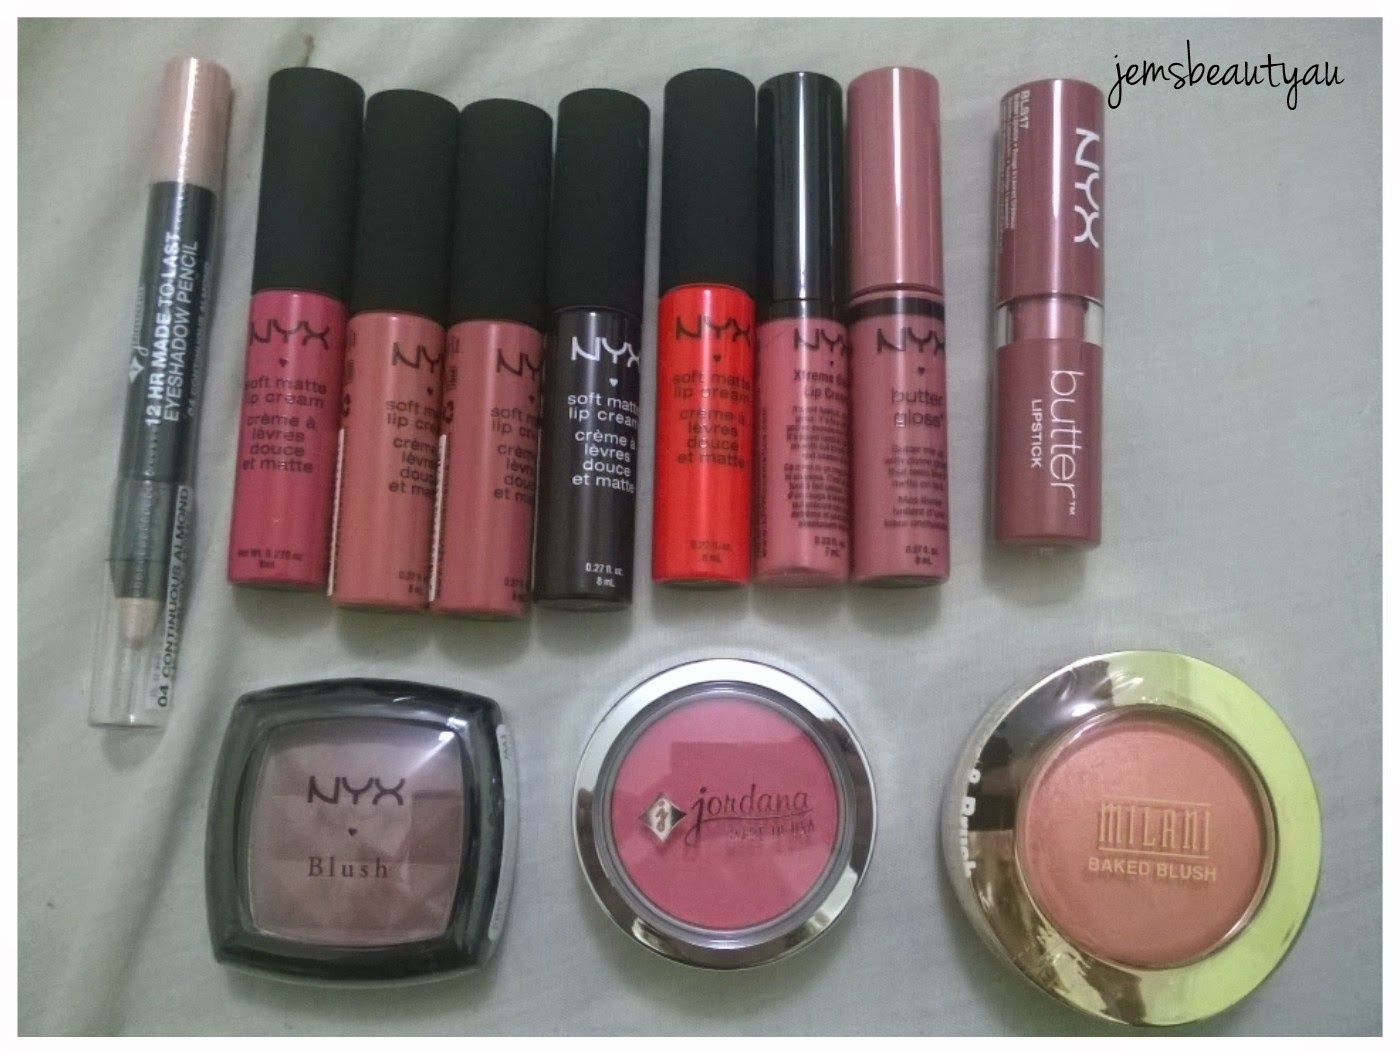
I promised guys! Here I am. My last exam was this morning so I'm keen as to get right into my blogging again, in addition to my random posts on my instagram @jemsbeautyau. So, I promised you a little review of everything I got in my recent Cherry Culture, and here I am to deliver!

Just a little reminder of what I got:
So hard to work out what kind of lip colours I like...

  • Jordana 12 Hr Made to Last Eyeshadow Pencil in "Continuous Almond"
  • NYX Matte Lip Creams in San Paulo, Cannes, Zurich, Transylvania, Morocco
  • NYX Xtreme Lip Cream in Nude Peach Fuzz
  • NYX Butter Gloss in Tiramisu
  • NYX Butter Lipstick in Pops
  • NYX Blush in Taupe
  • Jordana Blush in Rich Sorbet
  • Milani Baked Blush in Luminoso
Let's take a closer look at these:
No Flash.

Flash.
This goes:
  • Taupe
  • Luminoso
  • Rich Sorbet
  • San Paulo
  • Zurich
  • Cannes
  • Transylvania
  • Morocco
  • Tiramisu
  • Pops
  • Nude Peach Fuzz
  • Continuous Almond
All bundled up. The actual products were maybe a 1/10th of this size.

On the whole I am super impressed with everything I got, and all of it will get put to use. And, as I said in my last post, I was also very happy with Cherry Culture's shipping - everything got to me in less than a week, packaged very tightly and everything was in perfect condition. Highly recommend them!


THE BLUSHES

L to R: NYX Taupe, Milani Luminoso, Jordana Rich Sorbet

My pretties.

NYX Blush in Taupe
Oh man. When I got this I was a little intimidated as it looks really purple. Like how Tough as Taupe Colour Tattoo just looks straight up purple. It's scary okay. But, as I'm sure you guys have heard countless times in reviews before, this really is a perfect colour for contouring on pale skin. I even tried nose contouring with it and it worked well! Very happy with it and it'll be getting some good use. The only thing is I didn't realise how small it would be, but that's definitely not an issue - especially considering the $5 USD price tag.

Milani Baked Blush in Luminoso
This blush is gorgeous. I love coral/orange blushes because they look so natural on the face. This blush is so soft (look at the swatch!) and easy to blend. Definitely going to be needing some more of these. For $8 USD (the most expensive item in my order), I am very pleased.

Jordana Blush in Rich Sorbet
I'd never even heard of these blushes until I was scrolling through the Jordana page and saw that they were only $2.50 USD. "Two fifty?! I can't afford NOT to buy one!!!" I say as I mindlessly add it to my cart. I looked up a bunch of swatches and finally decided on Rich Sorbet because a) I don't have a colour like it, and b) I wanted something matte. When I got it, I kind of regretting it because it looks so pink. I tend to avoid pink on my face due to the natural redness of my cheeks. But, as you can see in the swatch, it's actually quite lovely and not too pigmented (a good thing in a bright pink blush), and my regret has disappeared. Yay!


NYX SOFT MATTE LIP CREAMS

San Paulo, Cannes, Zurich, Transylvania, Morocco


NYX Soft Matte Lip Creams in San Paulo, Cannes, Zurich, Transylvania, Morocco
I'm going to do a general review on the formula of these, then talk a little bit about each individual colour. In general, I love these matte lip creams. They glide on so nicely, and smell heavenly (sweet desserty sort of smell). My dry lips can't handle it for more than two or so hours though - at that point, I have to give up on the transfer-proof finish and apply a balm, or remove and reapply. But I don't even care, because the colours are unlike anything I've ever seen in a drugstore lip product. They are freakin gorgeous. The 2014 colours especially (which we don't have yet in Australia cos like, Australia). San Paulo is the only 2013 and the only one available in Australia. Although, it is crazy worth buying them online, because they're only $6 USD each. I really wanted Copenhagen and Prague but they weren't available. Sad times.
San Paulo is a really gorgeous dark mauvey bright pink. I got heaps of compliments when I wore this at my mum's party the other week, it is just so flattering. Zurich is a peachy nude, which is my favourite type of nude. Whenever I looked up swatches/compared tubes, Zurich and Cannes looked exactly the same, but are actually very different in terms of actual product. Cannes is a deeper, nudey mauvey brown, which is a great MLBB colour. Transylvania is a pain to work with, patchy as but with a gorgeous payoff when you get it ever (blotting helps). It's a dark, plummy purple-brown. Morocco is a super bright, red-orange (cos I needed another one) that is stunning.


THE OTHER LIP CREAMS/GLOSSES/STICKS
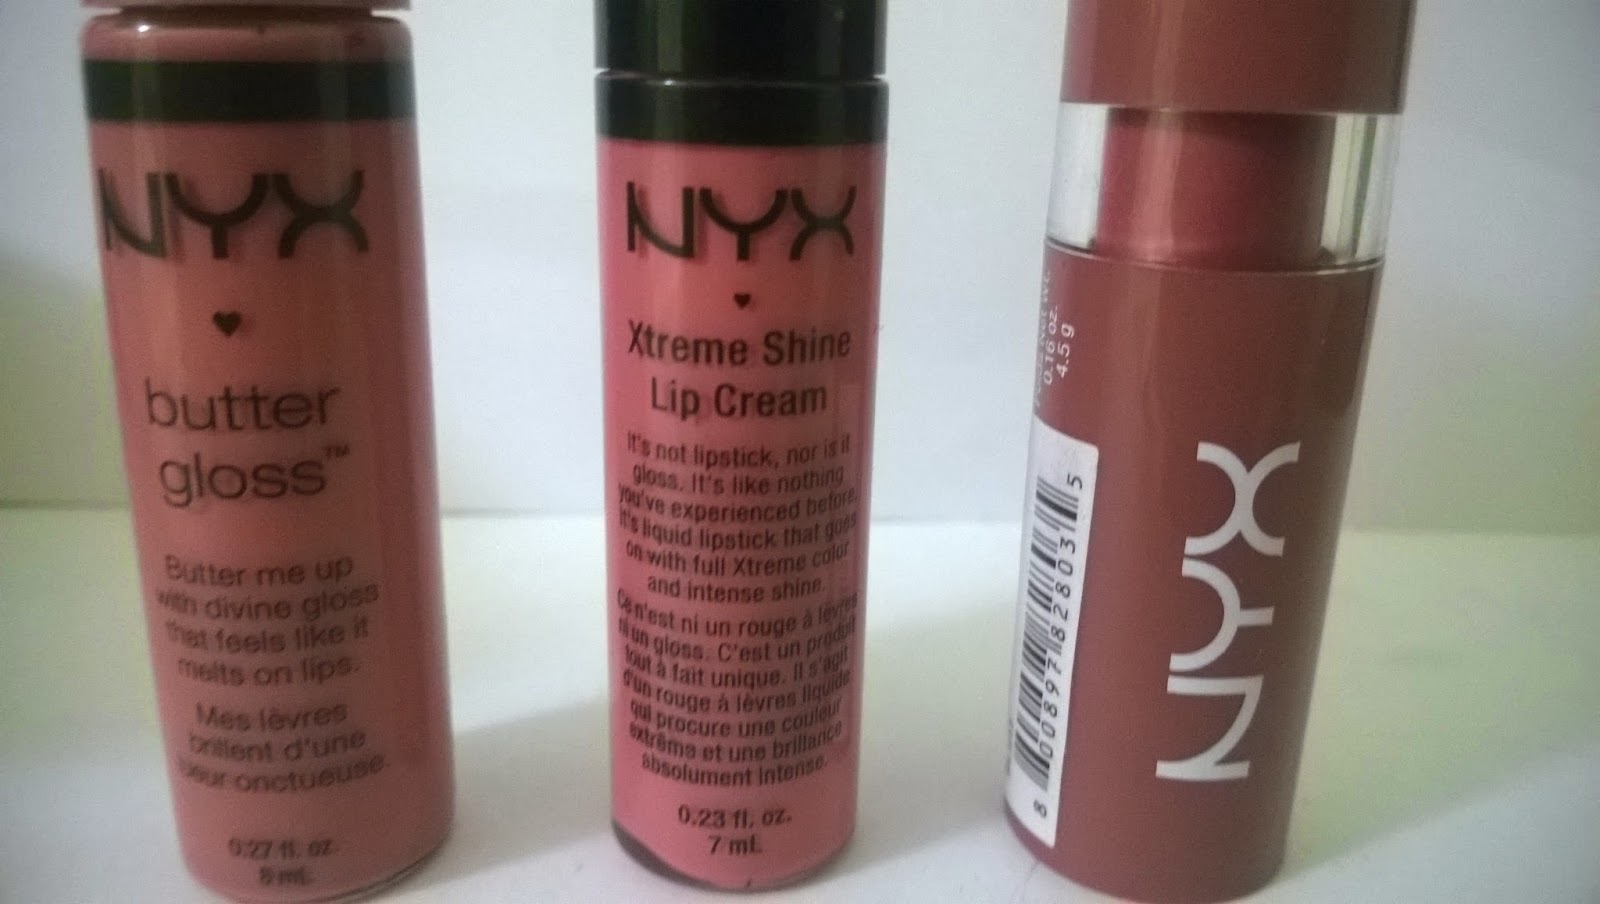
Butter Gloss in Tiramisu, Xtreme Lip Cream in Nude Peach Fuzz, Butter Lipstick in Pops


Couldn't get it to stay still.

NYX Butter Gloss in Tiramisu
I am not a gloss person. I tried to love this. I love the colour, a creamy light mauve. But I just don't wear gloss that much. That being said, I'll definitely try to wear this when I have a matte eye or base, and want a simple colour on my lips. Gloss girls, you'll love these. Great colour payoff and not THAT sticky (all glosses are sticky and anyone who tells me otherwise is a liar).

NYX Xtreme Lip Cream in Nude Peach Fuzz
You actually can't buy these in Australia either, except in the $30 5 lip packs you can buy at some Targets. So I wanted to grab one to try out the formula. The formula is kind of weird. It's a bit like a thicker, more pigmented version of the gloss. I thought it'd be more matte - not sure why, the word matte isn't anywhere on the packaging. But it's a great little product, just not very me. The doe foot applicator is sick though, I've never seen something like it - it's better than the ones on the Matte Lip Creams for sure.

NYX Butter Lipstick in Pops
MLBB!!! This is a perfect My Lips But Better Colour. Creamy, moisturising, glides on like a charm and has surprising staying power. Also doesn't sink into the lines of my lips! I was so stunned when I wore this for the first time. A definite winner, and I wish I heard more about it!


THE EYESHADOW PENCIL


Yeah. Follow the instructions. The lid is a bit of a pain in the ass.

Jordana Eyeshadow Pencil in Continuous Almond
I love this. I think it was $4 USD, and is just an all-round achiever. Eyeshadow base, inner corner highlighter, waterliner, even as a concealer around my eyes (just so happens to be the perfect colour). Only issue with it is that the colour kind of disappears as you blend it in. So it works best when you don't have to blend it all that much.


And another post is done! Hope you enjoyed reading guys, have I convinced you into doing a US product haul? I hope so. The price can't be beat. It just seems unfair when you go back to Priceline and a Maybelline lipstick is $18.

Practising on cutting down my blog post sizes (ok who am I kidding, no I'm not.)

Thanks for reading! And don't forget to follow me on Insty if you can't get enough of me - @jemsbeautyau <3

Friday, June 13, 2014

Quick Look at My Cherry Culture Haul - In-Depth Review to Come!

Hey guys! I'm in the middle of uni exams now (literally have one tomorrow), so I can't do a big long blog post as much as I'd like to, but I didn't want to leave you with nothing to read so I thought I'd quickly do a little post whilst on my study break.

If you follow me on Instagram (which you should - @jemsbeautyau), you'd know I just got my haul from Cherry Culture. It only took six days to get here! (Including a public holiday!) Super impressed.

Here's what I got:


A bunch of NYX lip products at obscenely cheap US prices, a NYX blush, a couple of Jordana pieces and an amazing Milani Baked Blush.

Here's everything laid out:
- Jordana 12 Hour Made to Last Eyeshadow Stick in Almond
- NYX Soft Matte Lip Creams in San Paulo, Cannes, Zurich, Transylvania, Morocco (I REALLY wanted Prague and Copenhagen but they didn't have them)
- NYX Xtreme Lip Cream in Nude Peach Fuzz
- NYX Butter Gloss in Tiramisu
- NYX Butter Lipstick in Pops
- NYX Blush in Taupe
- Jordana Blush in Rich Sorbet
- Milani Baked Blush in Luminoso


I'm so excited! Heaps of these (especially the Matte Lip Creams) have been on my wishlist for about six months now, and I finally had enough things I wanted to justify the shipping cost.

I'm really glad I finally got to try some things not available in Australia, since most of my beauty research takes place on /r/MakeupAddiction where many of the posters are American. So I've been reading about these products and brands for months and finally they are in my possession! Feels quite surreal to tell you the truth. I can't imagine the day where these American brands (I know NYX is available in Australia but the selection is SO limited and we are about 6 months behind on releases) are readily available in Target or Priceline or Myer. Seems unlikely but we'll see! Especially with the opening of Sephora (hopefully) this year in Sydney, maybe this is a huge turning point for the Australian cosmetic industry.

I digress. (I can't help but typing away and going off on a random tangent). It's not often I can do a big haul like this since its such a large chunk of money at once, even though per unit its way cheaper, so I was super super excited!

Again, I'll do a big review once my exams are over. Here are some swatches of all the lip products though!
From top left: San Paulo, Cannes, Zurich, Transylvania (one layer), Transylvania (two layers), Morocco, Nude Peach Fuzz, Tiramisu, Pops.
Hope this piques your interest for a further blog post, it'll be up within the next week I promise! Sorry for being so MIA, again once I get a decent camera and maybe a bigger income (once I'm on holidays and can earn some money), I'll be posting more frequently.

Until then, I'm always posting random things on Instagram and babbling away even more, so if you are interested in seeing more of my go follow me there!

Thanks for reading!